Overview
One of the user types in FogBugz is Community. Community users are free user accounts that allow you to partially (i.e., with limited access) open up your FogBugz to the outside. This article provides a guide to creating community users, creating community user groups, and adding community users to community user groups.
In order to use community users and groups, the option of community users should be turned on. For more information, see this article on Enabling and Disabling Community Users.
Process
Creating Community Users
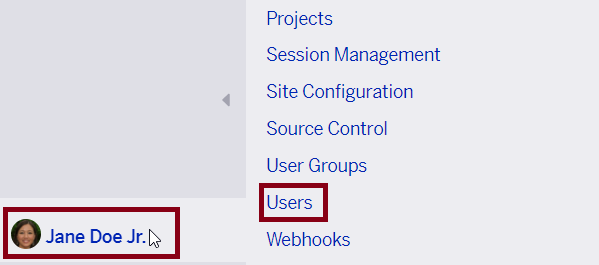
- At the bottom left of the FogBugz main screen, go over your Profile Picture or User Name.
- Click Users.
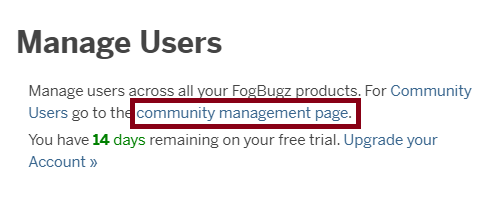
- Under Manage Users, click on the community management page link.
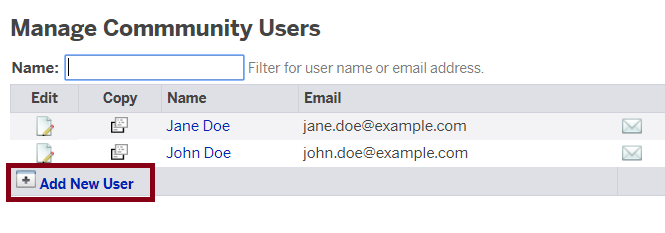
- Click Add New User.
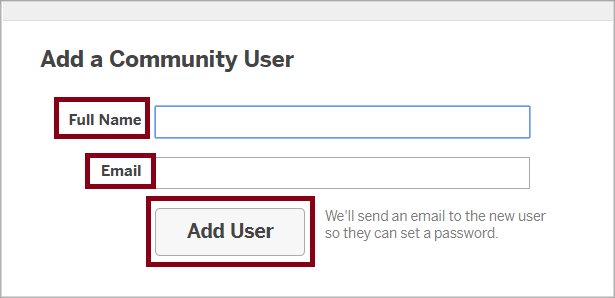
- At the pop-up window, enter Full Name and Email, and click Add User. You will see that the newly created user is added to the community users list.

Creating Community User Groups
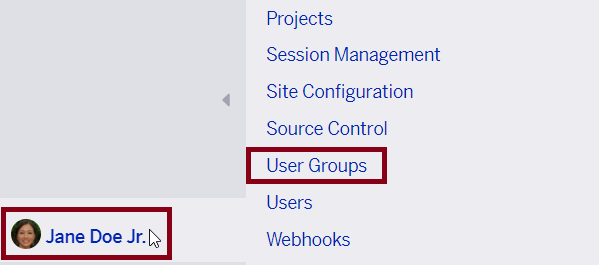
- At the bottom left of the FogBugz main screen, go over your Profile Picture or User Name.
- Click User Groups.
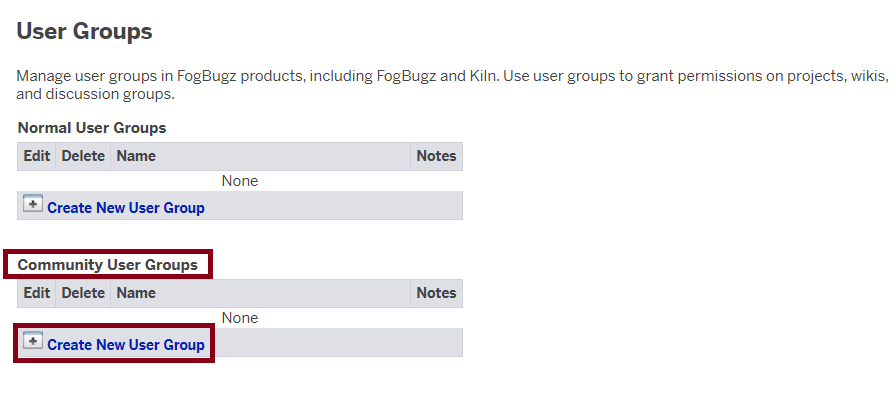
- Under Community User Groups, click Create New User Group.
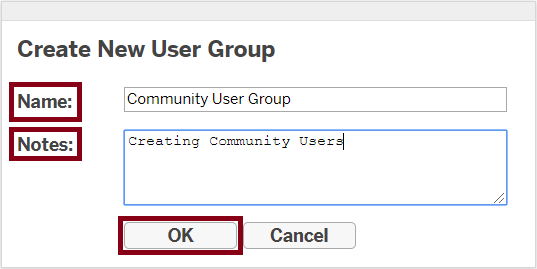
- At the pop-up window, enter the Name of the community user group you are creating, and write Notes about the group (optional).
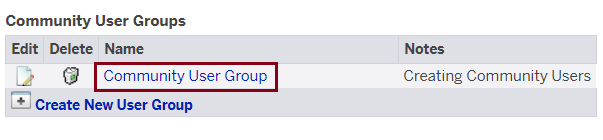
- Click OK. You will see that the newly created user group is added to the list.
Adding Community Users to Community User Groups
- At the bottom left of the FogBugz main screen, go over your Profile Picture or User Name.
- Click User Groups.
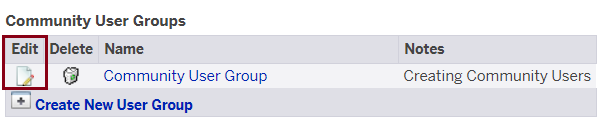
- Next to the community user group that you want to add users to, click the Edit icon (paper and pen).
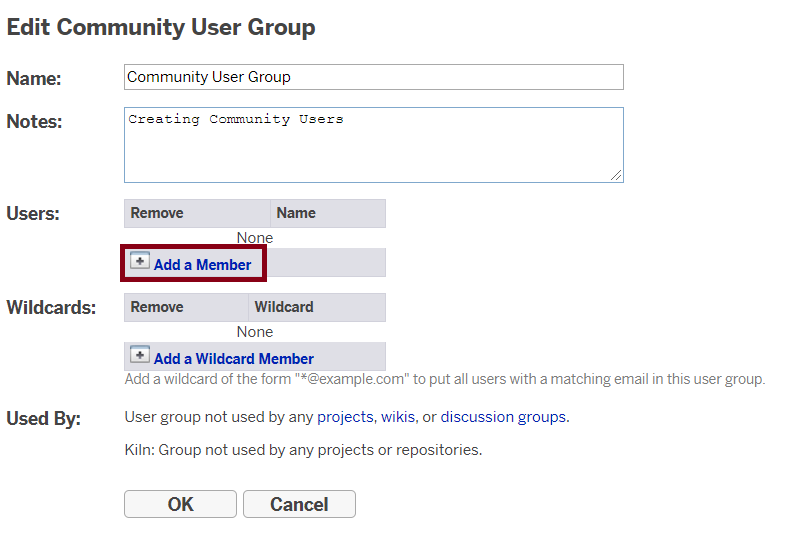
- At the Users title, click Add a Member.
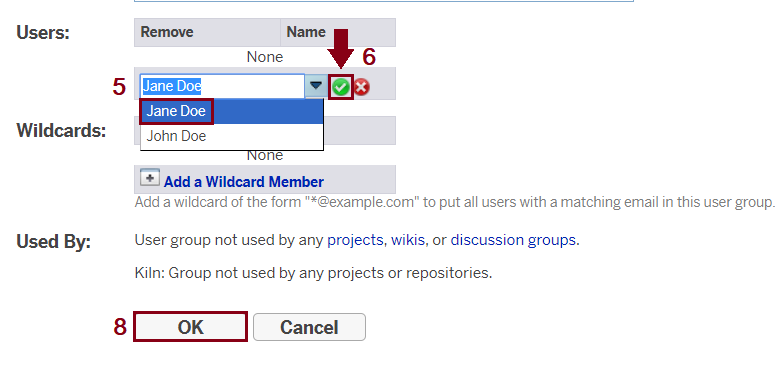
- From the emerged drop-down menu, select the user you want to add.
- Click on the check icon.
- Repeat step 5 and step 6 if you want to add more users.
- Click OK.
Supplemental Information
Once the community users and the community user groups are created, and community users are added to community groups, you can allow community users to submit cases and view other community users' cases. For more details, read this article on Allowing Community Users and Anonymous Users to Submit and View Cases.
You may refer your community users to this article on Using FogBugz as a Community User.
The video below provides guidelines for using community users and community user groups for the legacy site.
Your browser does not support the video tag. Please download and watch the video via this link: https://central-supportdesk.zendesk.com/hc/article_attachments/360005837540/Community_Users_Set_Up.mp4
Priyanka Bhotika
Comments