Overview
Due to security considerations, you might want to configure your FogBugz On-Premise instance to use HTTPS and SSL/TLS.
This article provides you the steps to enable HTTPS on your FogBugz On-Premise and configure the SSL/TLS certificate to use with it.
Prerequisites
- A working installation of FogBugz On-Premises that is accessible over HTTP
- A valid SSL certificate (can be a self-signed certificate if your FogBugz domain is the Common Name or Subject Alternate Name)
- The SSL certificate is imported to the FogBugz IIS server.
Solution
Note: Currently we support only IIS 8.5 and IIS 10.0 as per the Windows versions listed in the System Requirements.
Once you have acquired an SSL/TLS certificate to use on your server, configuring SSL/TLS and HTTPS on your FogBugz On-Premises instance requires the following steps:
- Enable FogBugz to accept HTTPS requests
- Modify the Registry Settings
-
Redirect HTTP requests to use HTTPS, by using one of the following methods:
- 2.a. Using URL Redirect method
- 2.b. Using URL Rewrite method
- As an additional step, you might need also to Configure ElasticSearch to trust the HTTPS connection towards your IIS server.
Enabling FogBugz On-Premises to Accept HTTPS Requests
- In IIS Manager, create a new HTTPS binding on the FB GEN ALL site. While creating the binding select the SSL/TLS certificate imported as a prerequisite. Your binding configuration should look something like this:
localhoston port 80-
{your_fogbugz_fqdn}binding on port 443.Optionally, you can restrict IP addresses for 80 and 443, or you can bind all hosts on 443 depending on the environment.

- Verify that the binding works by pointing your web browser to the HTTPS version of the site.
- In the appropriate FogBugz trial database (the default trial database is
trial1), run the following command to update thePrefixof the URL in outgoing emails:
UPDATE Setting SET sValue = replace(sValue, 'http://', 'https://') WHERE sKey = 'sUrlPrefixEmail'; - Navigate to your site via HTTPS.
- Verify that you can load the filters and get the expected results.
Modify the Registry Settings
- Press the Windows and R keys together.
- In the Run dialog box, type
regeditand press Enter to open the Registry Editor. - Look up and select the following registry path
HKEY_LOCAL_MACHINE\SOFTWARE\Fog Creek Software\FogBugz\<your_install_path>.
Replace<your_install_path>in the registry path with the actual installation path. - Check if the registry keys
fForceHTTPSandfSSLOverrideappear in the right pane of the Registry Editor window. - Double-click
fForceHTTPS. - Set the Value data to
1and click OK. - Double-click
fSSLOverride. - Set the Value data to
1and click OK. - Click File and select Exit from the menu bar.
Setup IIS to Redirect all HTTP requests to HTTPS
Read the article about the Differences between URL Redirect and URL Rewrite. Network policies might influence your decision (ex. proxy settings). We list both methods for your convenience.
localhost as the HeartBeat Pinger service uses it.
URL Redirect
If you prefer URL Rewrite, skip the steps of this method.
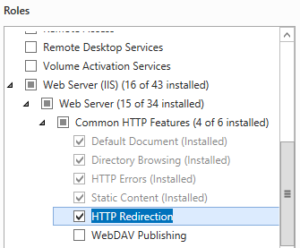
- Ensure that the HTTP Redirection functionality is enabled by navigating to Server Manager > Manage > Add Roles and Features > Web Server (IIS) > Web Server > Common HTTP Features > HTTP Redirection.
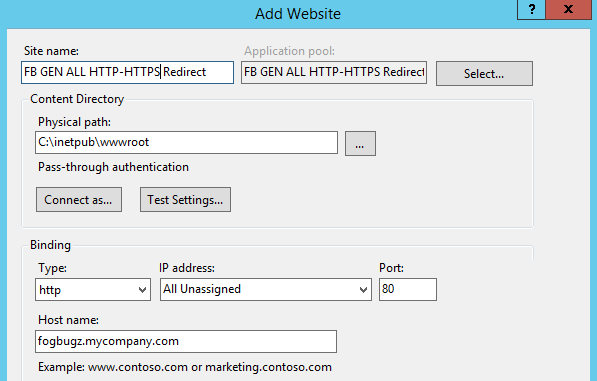
- Create a new website that redirects
{your_fogbugz_fqdn}:80traffic to{your_fogbugz_fqdn}:443.
The physical path can be the defaultwwwrootpath (or anywhere else on the disk). - Bind the new website on
{your_fogbugz_fqdn}:80.
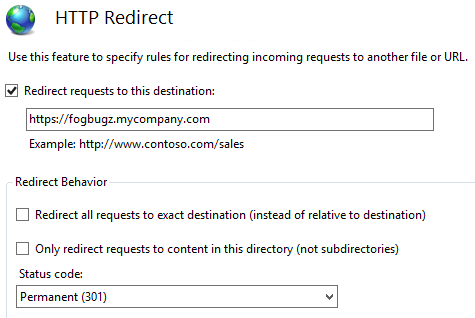
- Configure an HTTP Redirect (IIS Manager >
{your redirect site}> IIS > HTTP Redirect) to the HTTPS variant of your FogBugz FQDN.
- Restart the webserver in IIS.
URL Rewrite
If you already configured URL Redirect, do not configure URL Rewrite.
- Download and install the URL Rewrite module of IIS.
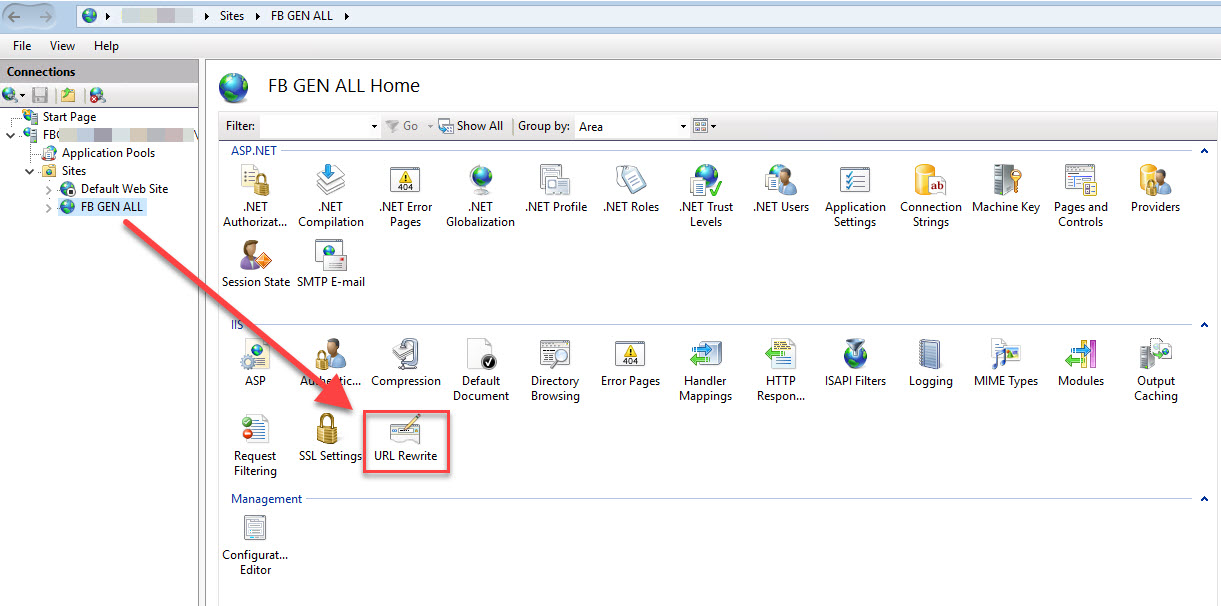
- Select your FB GEN ALL site, then click on URL Rewrite.
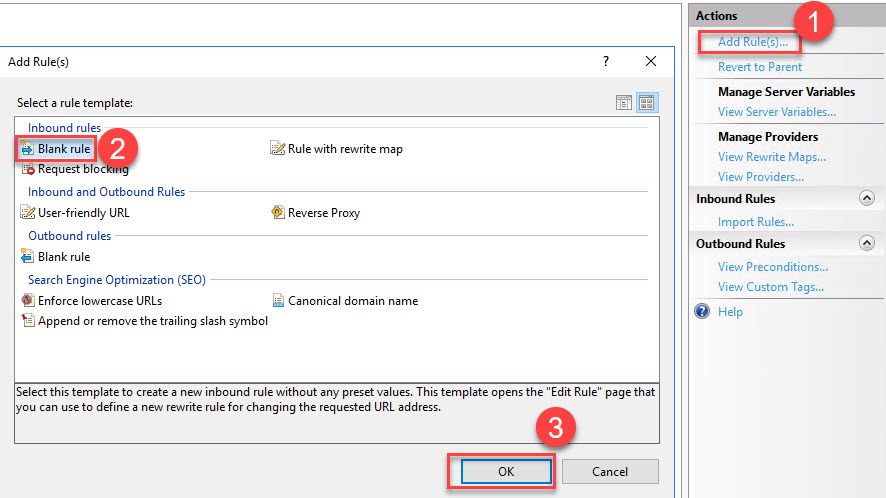
- Click Add Rule(s) in the right side menu, select Blank rule in the Inbound rules, click OK.
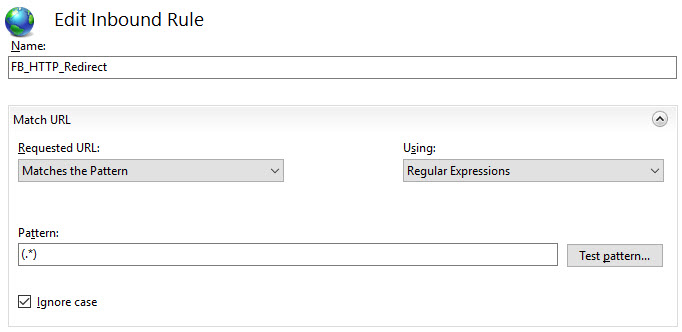
- Enter any name for the rule.
- In the Match URL section:
- Requested URL: Matches the Pattern
- Using: Regular Expressions
- Pattern: (.*)
- Ignore case: checked.
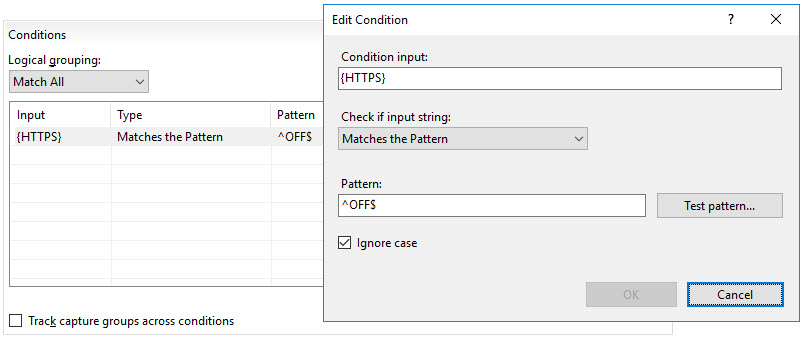
- In the Conditions section:
- Logical grouping: Match All
- Click Add...
-
- Condition input: {HTTPS}
- Check if input string: Matches the Pattern
- Pattern: ^OFF$
- Ignore case: checked.
-
- Click OK to add the condition.
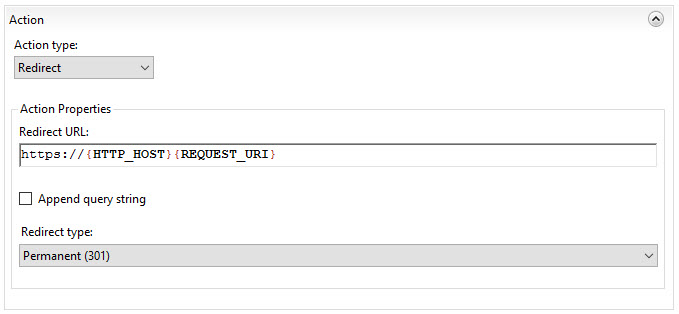
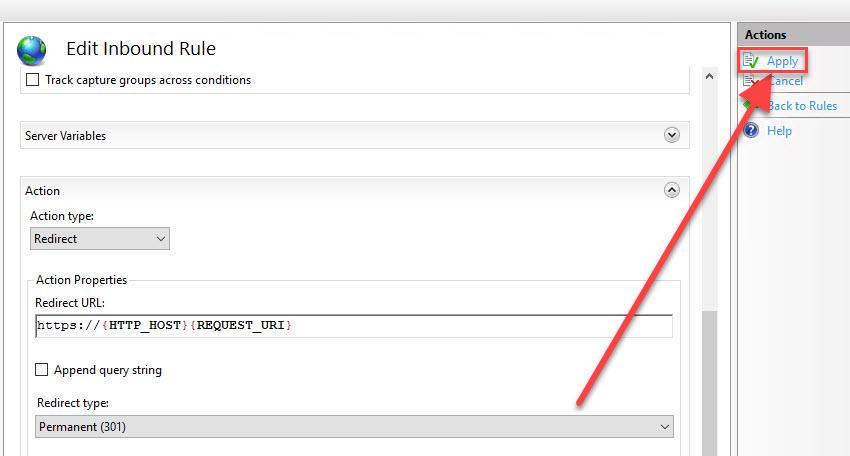
- In the Action section
- Action type: Redirect
- Redirect URL: https://{HTTP_HOST}{REQUEST_URI}
- Append query string: Uncheck
- Redirect type: Permanent (301)
- Click Apply in the upper right corner
- Click Back to Rules to see your new rule in the rule list.
- Restart the webserver in IIS.
Testing
- Verify that going to the HTTP version of your site redirects you into the HTTPS version.
- Verify that you can load your filters and get the expected results.
Priyanka Bhotika
Comments